Week Seven
Click the Arrow to Proceed to Project Page
Click the Arrow to Proceed to Project Page
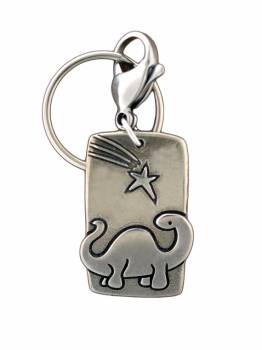
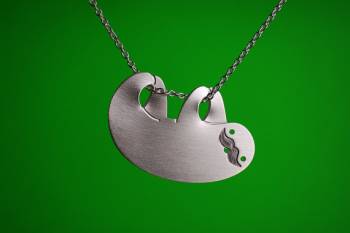
Making a Sloth Necklace and a Dinosaur Keychain

The process:
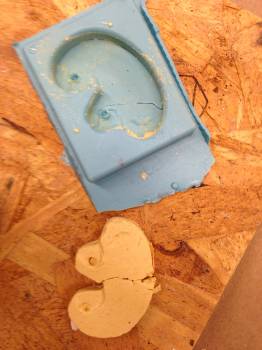
Molding and casting is a really fun hands-on process. I started by creating models of the pieces in SolidWorks. I opted to go with two pieces that would be flat on one side to avoid the process of creating a two-sided mold. I also wanted to make both pieces small enough to fit on one piece of wax.


Method:
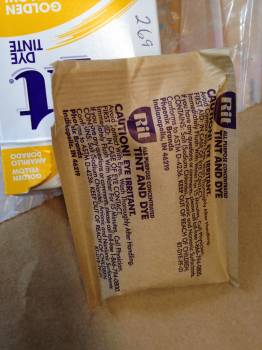
There are a lot of combinations of mold and cast materials that we were introduced to. I did not intend to make these materials food safe, so that allowed me to try a variety of materials. I ended up milling wax for both of the designs, then creating molds out of Oomoo for both designs. I also used MoldMax to create a mold for the sloth. I cast the dinosaur in liquid plastic, and the sloth in liquid plastic, dyed liquid plastic, and drystone (which promptly broke).
I used the smaller shop bot to mill out the wax. We used a ball-tipped endmill to create smooth features. The rough cut is used to create the overall shape, and the finish cut then uses the ball tip to create a smooth, clean surface.
SOME MILLING TIPS:
- Glue the wax to a wood board, and screw the board down to ensure that it will not move during milling. 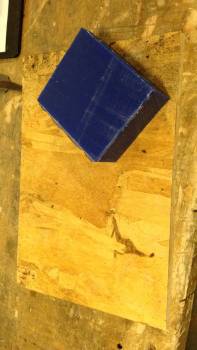

-After creating the .stl files in Solidworks, open them in PathWorks 3D
- Orient the piece so that the longer dimension is along the x axis and it lies on its side. Keep in mind that we are not using 5-axis milling, so any undercuts will not be possible. Change the material size to reflect the size of the block.
- Resize your piece to ensure that it will fit on the block of wax. Keep a distance of .13 symmetrically around the piece to ensure that there will be walls for the liquid when preparing the mold.
- Similarly, set the depth of model around surface = .125 inches so that the liquid will be contained
- Spindle speed 6000
Depth of cut .125
Tool = 1/8
- Use the preview tool to look at how the cutting process will work and how details will come out.

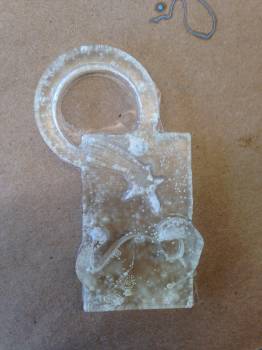
During my initial cut of the keychain, the shopbot experienced some issue that caused it to cut incorrectly and ultimately disconnect from the computer.

This resulted in some holes in my piece, and the finish cut didn't run to completion.

Ultimately I resized the piece to be larger, shut down PathWorks, and remilled on another piece of wax (Juliana did not use hers). This worked out! 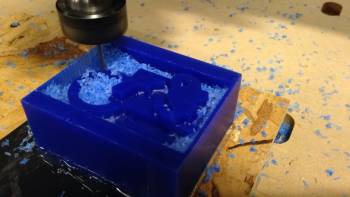
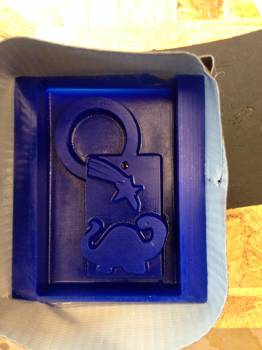
Molding
For the first round of mold-making, I used the liquid rubber. Liquid rubber was really fun to use as it was pretty forgiving, relatively quick to cure, and quite sensitive. I wrapped tape around both of my molds to make it easier to remove to rubber once it had cured. I used Mold Release to coat the wax so that it would be really easy to remove my mold. A key mistake that I made here is that I did not smooth the mold release out - it turns out that the Oomoo is sensitive enough that it picked up on the height difference between certain areas with mold relsease and those without it, so my molds look like they have cracks in them. I mixed the oommoo with a 1:1 ratio of part A to part B and mixed thoroughly until the entire mixture was a uniform color. I spent a lot of time tapping the cup on the table to ensure that my mold had no bubbles. Other than the cracks, I mostly succeeded. I left the Oommoo to dry overnight, but really it only took about 2 hours to dry ( I remade the dinosaur one the next day and found this out).


I also made a MoldMax mold so I can eventually cast in metal (though this week did not seem like the time to do it). For MoldMax, it is really important that the ratios are correct, so I used the scale to weigh out the materials that I used. Also, MoldMax takes a very long time to dry, so I left it overnight.
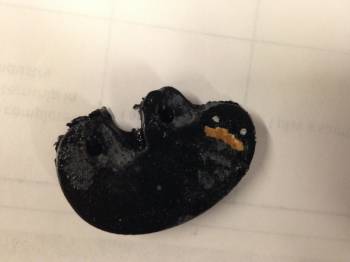
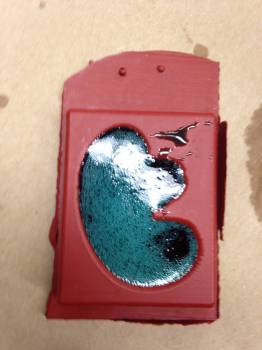
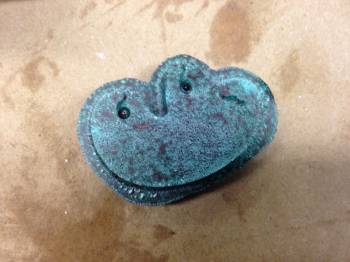
I ended up casting the sloth in drystone, then liquid plastic (which I spray painted), and then liquid plastic with food coloring (not a good idea). I cast the dinosaur in clear liquid plastic. Like the liquid rubber, I mixed Part A and B in a 1:1 ratio. The solution turned a bit opaque. I used water to estimate how much I would need to pour into the molds. The plastic heated up as it set. I left this for about half a day. With my first casting attempt, the clear plastic had a ton of bubbles in it, so many of the features were masked.

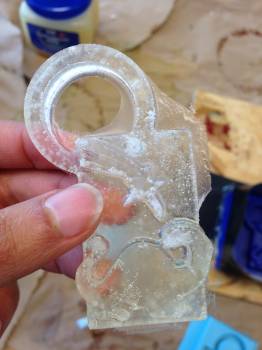
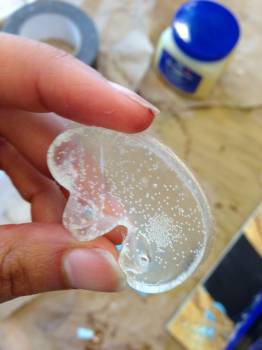
I ended up spray painting the sloth to see if this would help bring out the details (it kind of did the opposite).I used some primer first, let it dry, and then used a coat of black spray paint. Despite the primer, the paint did not adhere to the plastic very well. I ended up using silver and gold sharpies to accentuate the details in the sloth. I also needed to cut through the holes with an exacto knife because the mold did not create holes that went all the way through. I also used the exacto knife to remove the flashing left where I had let the plastic flow a bit over the mold cavity.
For the drystone, Alexis and I tried to get creative and add some powdered dye to our casts. We hypothesized that this may have actually destroyed some of the structural integrity of our pieces, as they both broke as we removed them from the mold.

As it turns out, adding water-based dye to the liquid plastic polyurethane results in the creation of foam, rather than a nicely colored piece of plastic.


Going Forward
Now that I have the mold made of tin-cured silicone (Mold Max), I can cast my sloth in metal! I hope to do that in the near future and see if I can string a necklace through it. I also want to acquire the appropriate dyes to remake the keychain and see if I can make some cool casts with that. I think during composites week I might look into how to coat the casts in a material that makes them tougher, so they don't crack as quickly when dropped. I also might attempt to paint the plastic keychain with acrylic paint to see what the effect is.
Thanks to Alexis, Juliana C, Juliana N, Jonathan, Tom, and Palash for their help, support, and snacks :).